Detecting DNS Exfiltration with Wireshark
DNS tunneling is how attackers exfiltrate data through DNS queries that look normal. In this mini lab, I simulated both normal and suspicious DNS traffic using Python + Scapy, then analyzed packet behavior in Wireshark to detect signs of data exfiltration.
This is the part 2 of my hands-on network forensics series, which is focused on identifying unusual DNS patterns that could indicate tunneling or data leaks.
1: Generate Simulated DNS Traffic
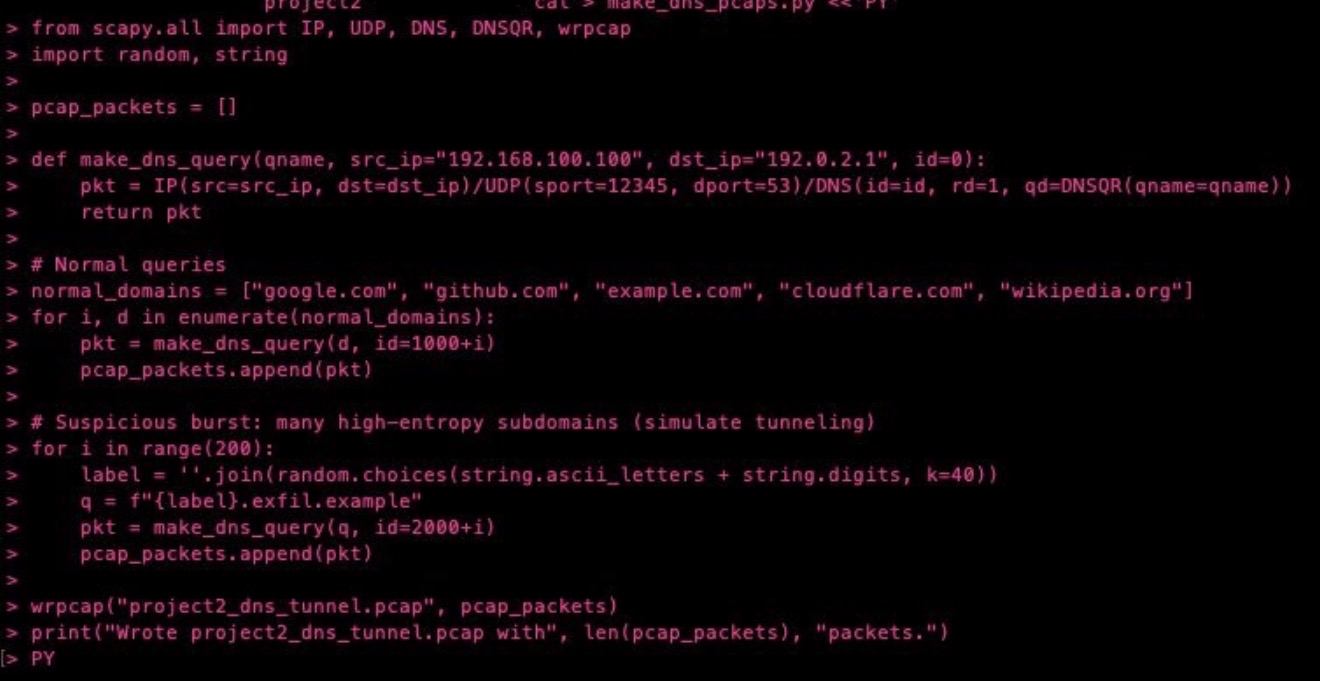
I wrote a short Python script using Scapy to generate a .pcap file containing both normal DNS queries and suspicious, high entropy subdomains that mimic exfiltration behavior. The file was then exported for Wireshark analysis.
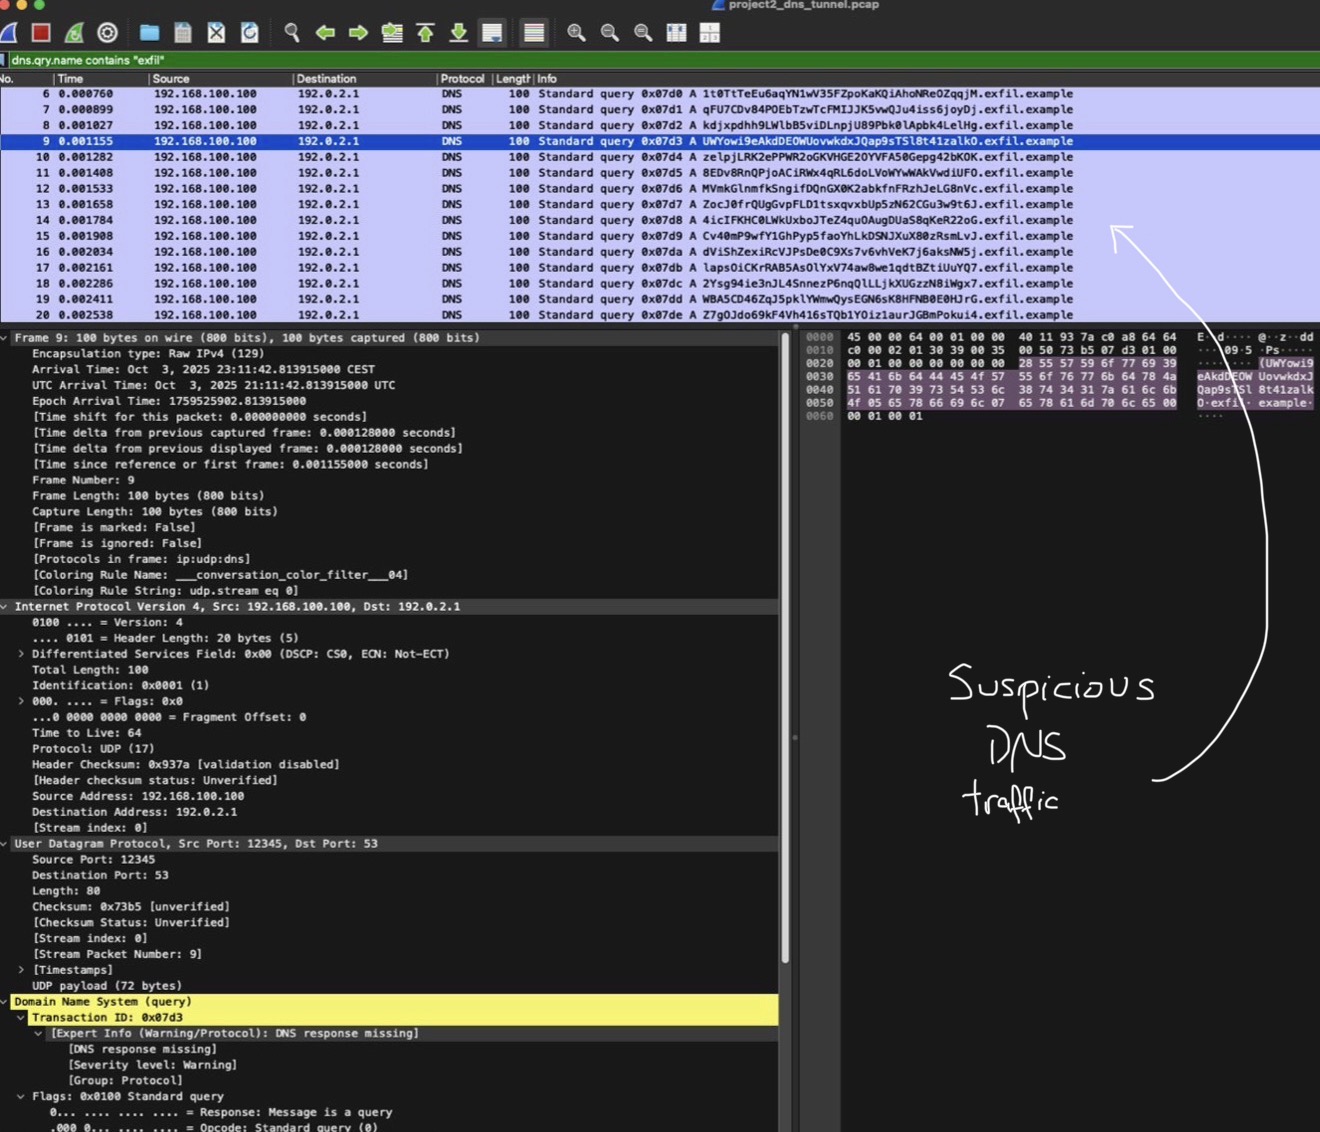
2: Analyze the PCAP in Wireshark
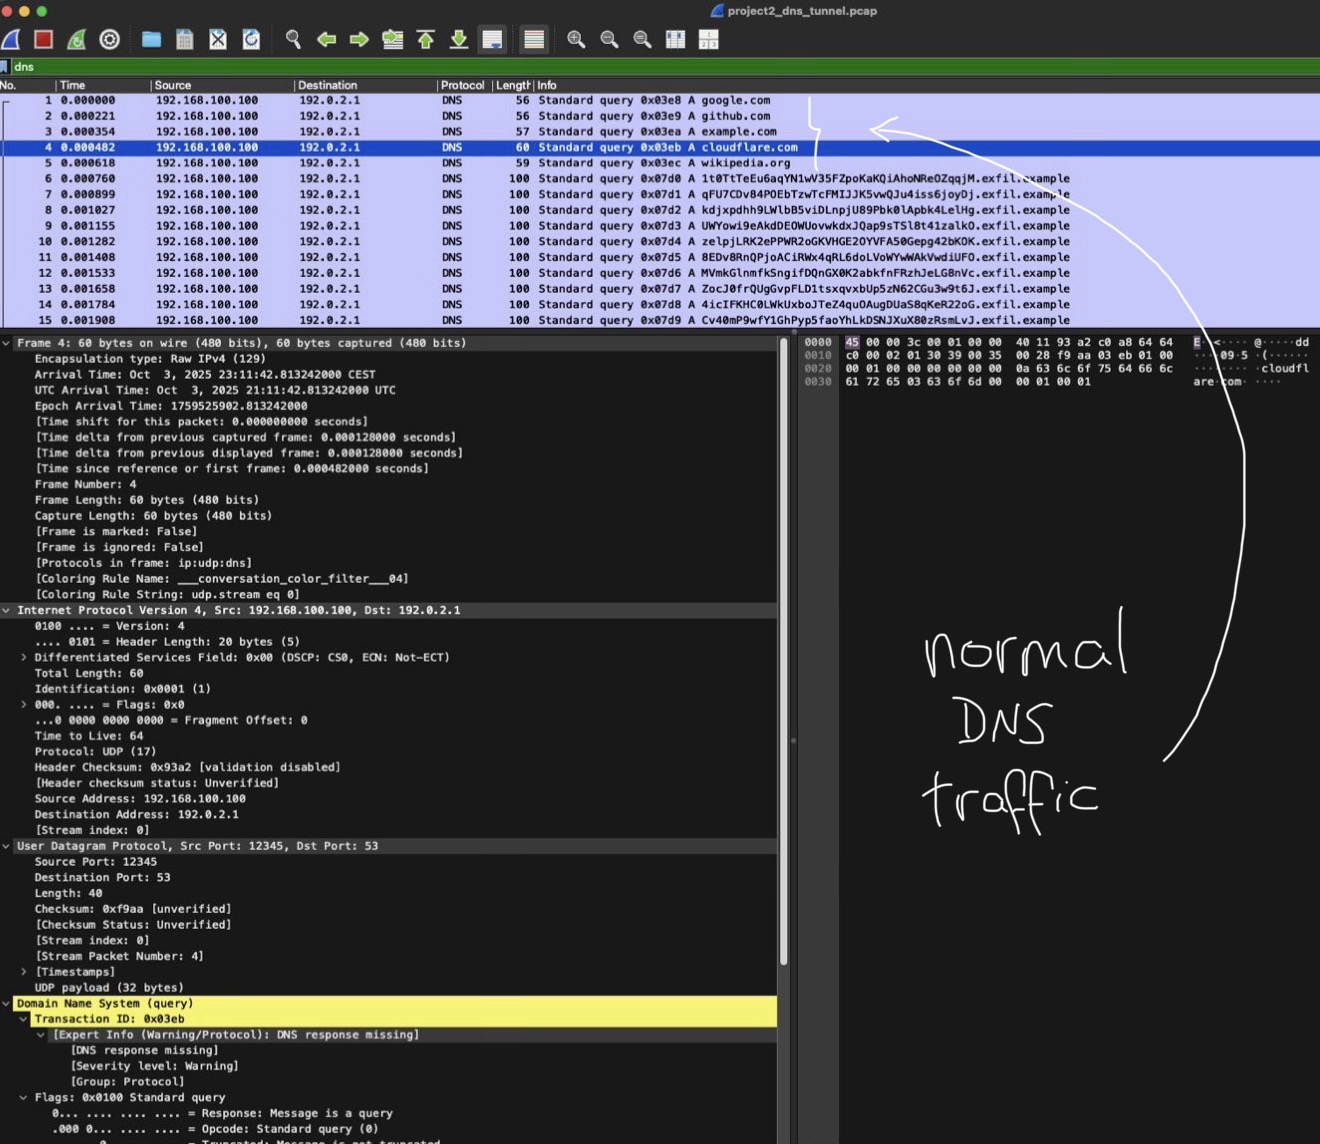
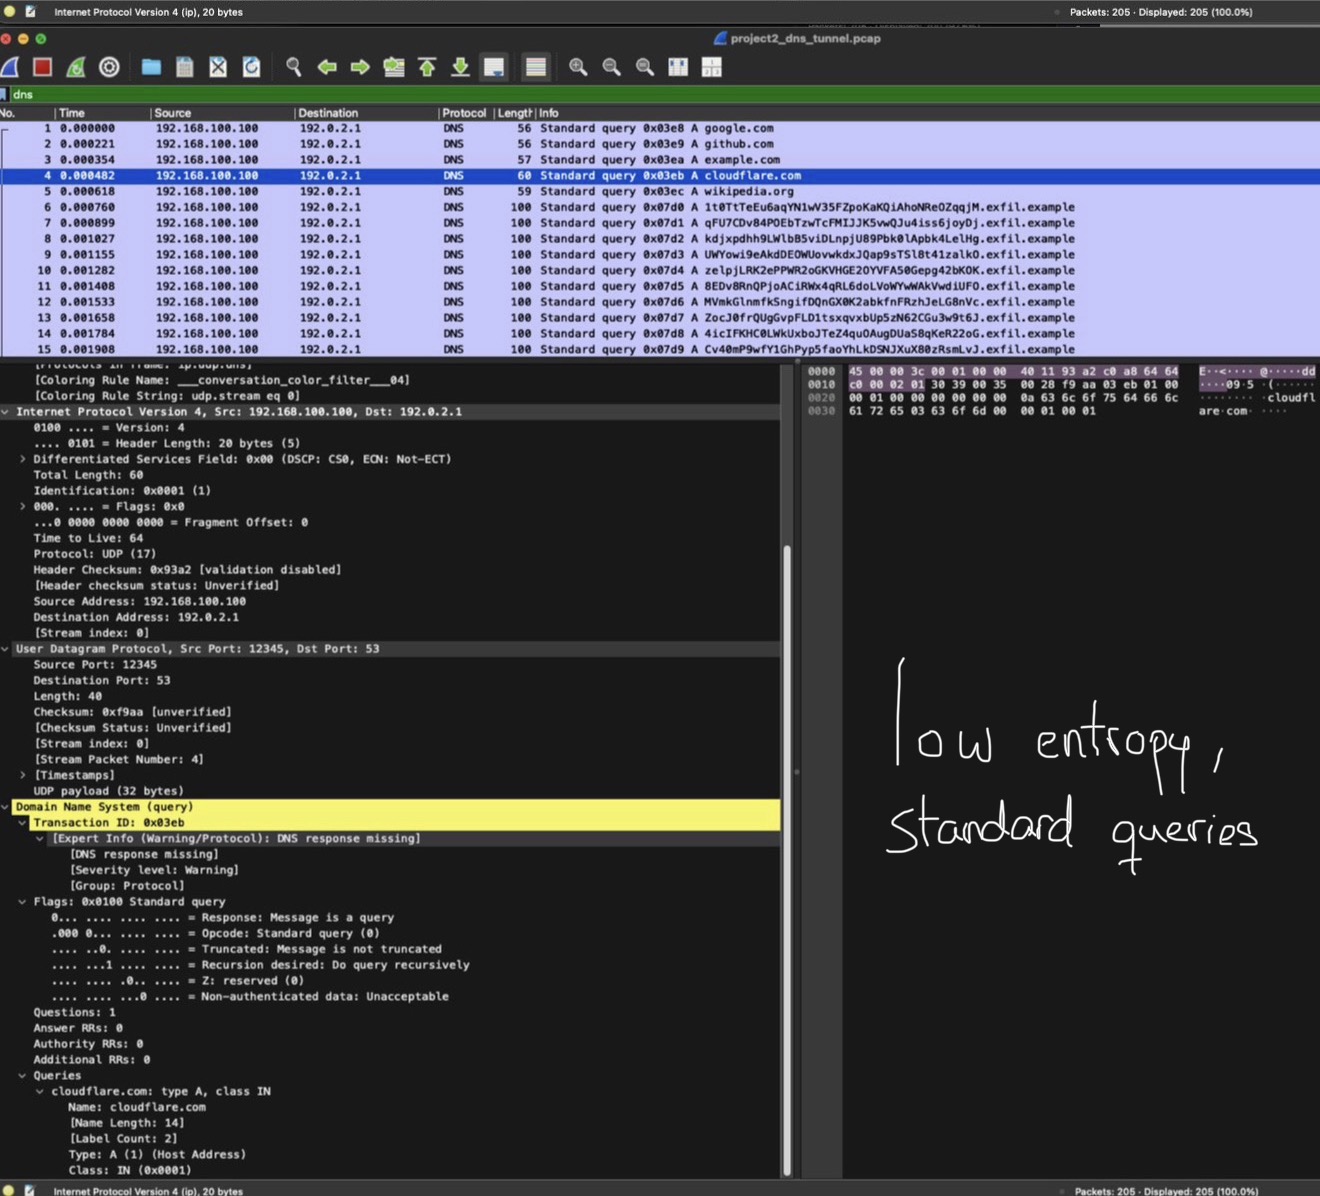
Opening the project2_dns_tunnel.pcap file, I inspected DNS packets and compared legitimate queries (google.com, github.com, etc.) with the generated suspicious traffic (*.exfil.example).
3: Observe Normal DNS Queries
Normal traffic showed low entropy, human readable domain names and proper DNS responses. These packets represented standard user-initiated lookups.
4: Identify Suspicious Patterns
Suspicious traffic showed unusually long subdomains filled with random characters; a common indicator of DNS tunneling. Many queries had no responses or incomplete exchanges, which suggests abnormal activity.
5: Compare Entropy & Behavior
By visually comparing both patterns, I confirmed how tunneled data often looks chaotic compared to ordinary DNS traffic. Even without automation, this manual inspection highlights how analysts can spot covert channels.
Conclusion
This lab deepened my understanding of how exfiltration can hide within legitimate protocols. Hands-on traffic simulation and analysis gave me a clear picture of how DNS tunneling operates and how to identify it visually in Wireshark.
Screenshots
Click any image to zoom.

See the quick summary on Instagram @maria.cybersec.